
Locations tab
Overview
The locations tab represents all current locations set up and associated with your merchant account.
Viewing locations
All locations created for your business will appear in the table, with the latest ones at the top. There is pagination at the bottom right (< 1 >) if there are too many locations to show on one page.
Note: to ensure you're viewing the most recent list of locations, click the refresh button to update the table
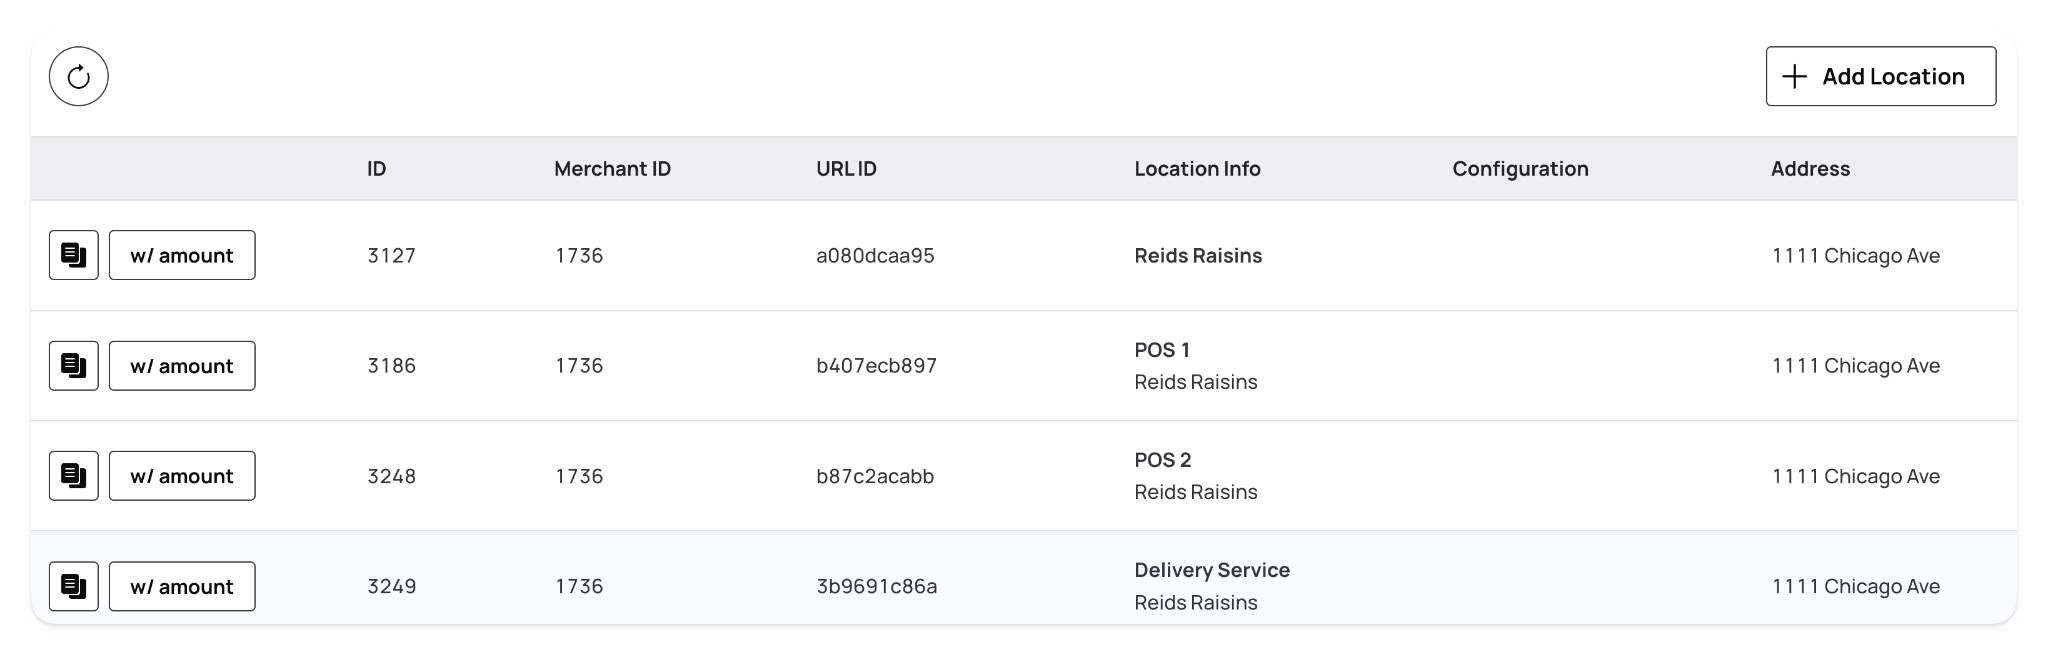
Here's what each column in the location table represents:
ID → the unique identifier assigned to the location in the system
Merchant ID → the ID of the merchant account that owns the location
URL ID → the custom identifier used in the URL path for this location
Location Info → the name and identifying details of the location
Configuration → indicates whether the location is set up with custom branding
Address → the street address of the location
City → the city where the location is based
State → the state where the location is based
Zip Code → the postal code for the location
Date Created → the date and time the location was created in the system
Creating a new location
To create a new location, Admins can select the “Add Location” button at the top right of the table. Doing so will pop up a window to add the new location criteria described below.
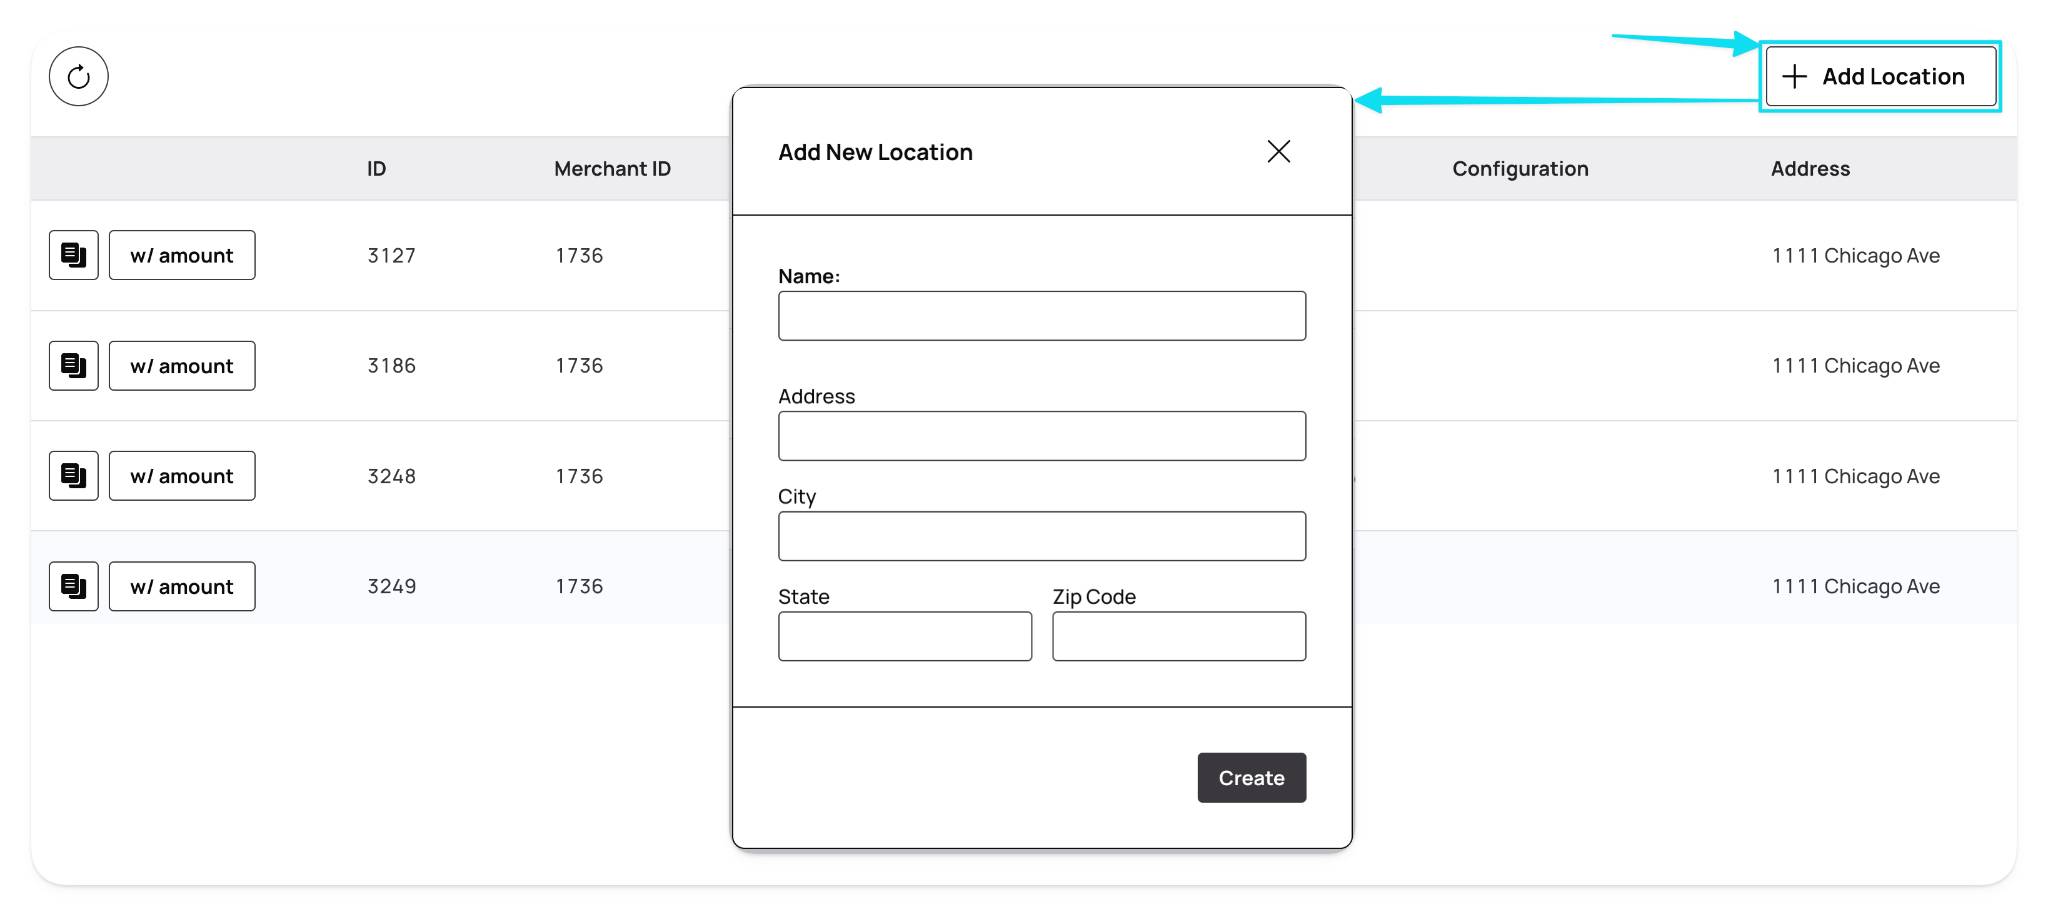
The criteria needed to create a new location are:
Name → the name of the location, which will be visible to the customer
Address → the street address associated with the new location
City → the city associated with the new location
State → the state associated with the new location
Zip Code → the zip code associated with the new location
Editing a location
To edit a location scroll to the end of the location entry inside the table. At the end of the entry you will see the edit and trash can button.
Click the “Edit (pen)” button at the end of the entry. Doing so will pop up a window to update the selected locations' information. Click “Update” to update the information.
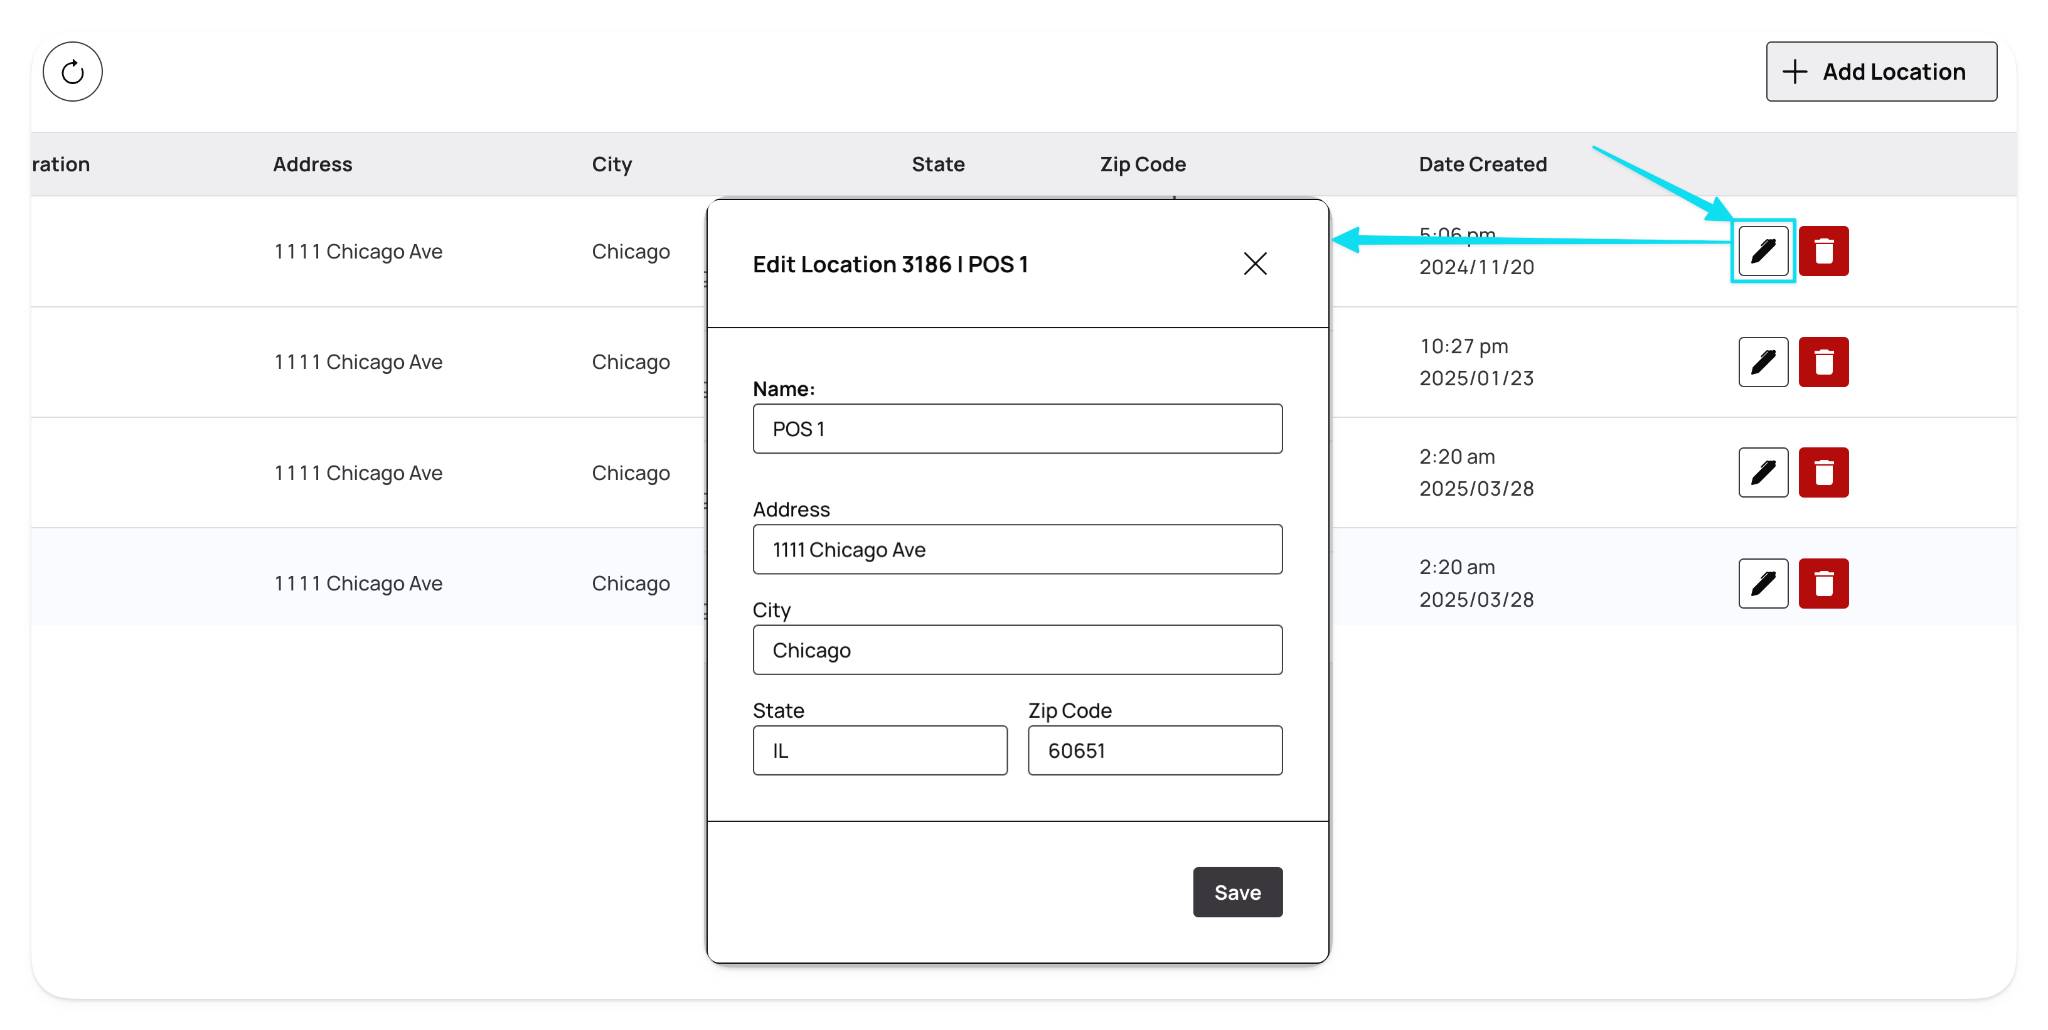
The information available to edit is:
Name → the name of the location, which will be visible to the customer
Address → the street address associated with the new location
City → the city associated with the new location
State → the state associated with the new location
Zip Code → the zip code associated with the new location
Grabbing location payment links
To generate two different payment links for a specific location, click the "Copy (two pages)" and the "w/amount" buttons at the beginning of the location's entry in the table.
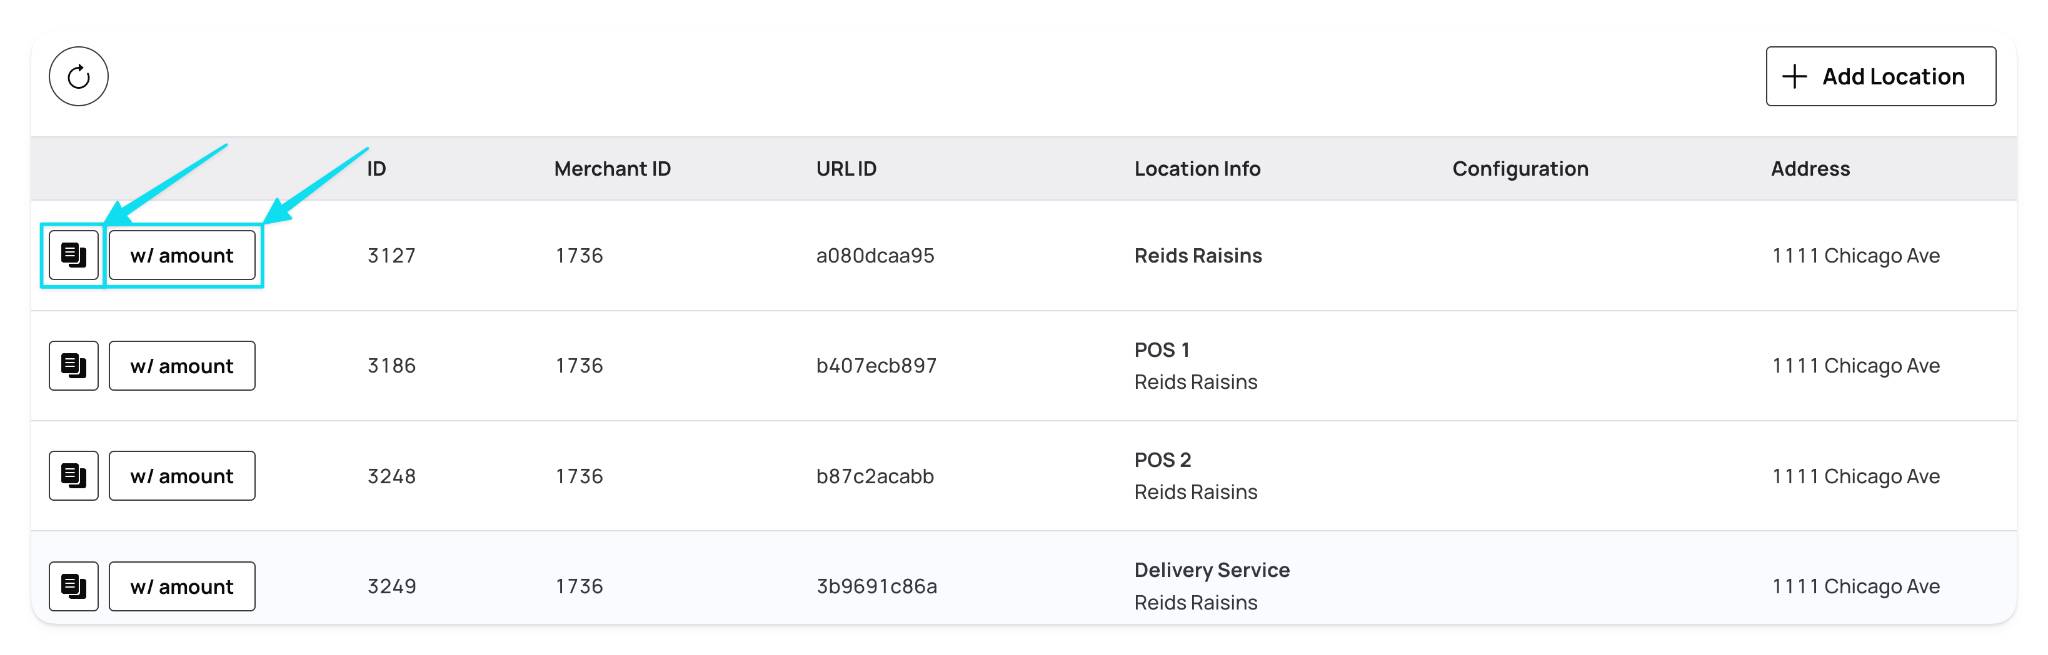
Each button generates a different payment link outlined below:
Copy (two pages) Button → copies a standard payment link where there is no dollar amount associated
w/Amount Button → allows typing in a dollar amount for this payment link. the dollar amount will always be associated with that copied URL
Clicking these buttons will copy the desired payment link URL to your computer's clipboard, where you can easily paste it wherever needed.